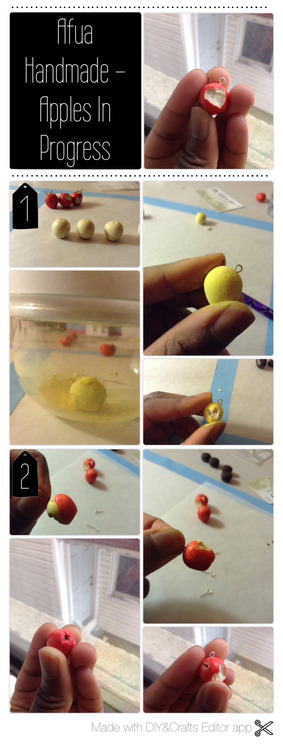
Showing posts with label Fimo. Show all posts
Showing posts with label Fimo. Show all posts
Saturday, February 1, 2014

Saturday, December 28, 2013
Throwback Thursday?


- I have a better picture of the Katy Perry creation on DeviantArt.
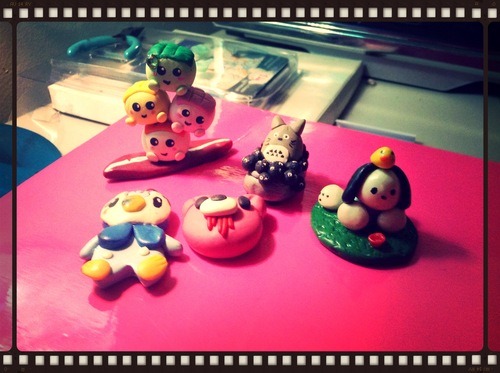
- I think that everything but the Totoro was was for a contest.
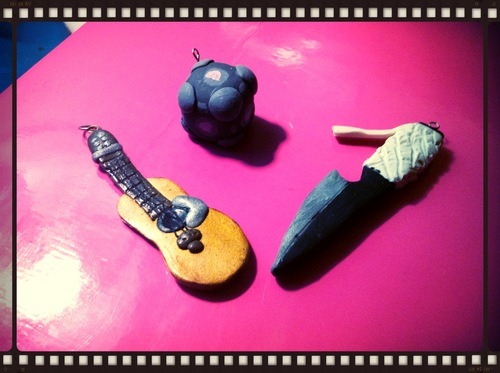
- My attempt in making a guitar of a friend, I never liked how it turned out so I just never gave it to her.
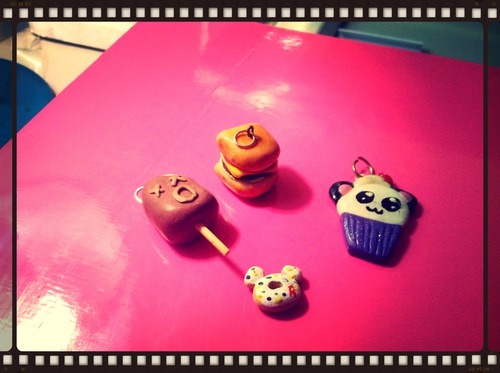
- The little Popsicle is the first charm I ever made.
Wednesday, October 23, 2013
Inspiration for Stary Night Bird Jewelry Set


Suggested by gasaii. Also inspired by the song “Skinny Love” by Bon Iver
Symbols:
The navy blue color/glitter: does it remind you of the stars? Well, the idea was to make it seem as if you where looking under the night sky and making a wish to the biggest star you see. Which was the 4 silver glitter pieces that look like an eye :)
The Rose: of course represents love, it’s shaped like a stencil to look like a constellation.
The Tear: not necessarily meaning pain, but a mix of emotions both good and bad.
The Bell: is the beginning and end of love
The Bird: represents hope.
Wednesday, August 7, 2013
How I Color Translucent Clay

Hey everyone so this post is actually very simple but I must state that if you want to get the best results you have to know which translucent clay is good for you. From my experience premo white translucent gives off the best results, regular translucent permo….while how should I say this :(
Okay so lets start:
What you need:
- Translucent White Clay if your using a sculpey brand
- Soap colorant, food coloring or alcohol ink for best results
Step 1: Roll out any amount of the clay you want and flatten it. You really have to make sure that your hands and the surface around you is clean because the liquid from the colorant is going to make the clay soft.


Step 2: Add a drop of the liquid to your clay mix it and then repeat this step until the color appears to your liking.

Step 3: Mold your clay into any shape you want then bake according to the brand’s instructions, for me it’s usually 30 minutes at 275 degrees Fahrenheit (135 degrees Celsius)

And this is how it should turn out; the colors seem very elegant to me :)
♥♥♥♥ Thanks for reading, please leave a comment or if you have questions ask ♥♥♥♥
Thursday, July 18, 2013
I Threw it Away

I made this chibi I would say about a year and a half ago and this is the only photo I have of it take on my phone before I I took it apart and throw it away. I don’t know why I did such a thing because when I look back on it’s one of the few chibi creations that I was very proud of. Even though it was simple it still had in way more work and detail for my first start,
What do you think?
Thursday, July 4, 2013
Tuesday, February 19, 2013
5 Ways To Make Your Polymer Clay Scented

*This little article came from my old blog Nature’sMySweetTreat which before that came from my older blog SongInTheSnow ( know I switch a lot)
Have you ever bought a polymer clay charm over Esty or some other online shop, took a whiff of it and wondered to yourself “oh this smells so good, I most know how they did this”
Most people like to keep this as a big secret but in my opinion it’s not and I believe that it should be shared with everyone who’s willing to learn.
What you Need:Scented Oil(s) (Fragrance or Essential)
Polymer Clay
Fimo Liquid Clay/Translucent Liquid Sculpey (TLS)
Glaze/Varnish/Gloss
Chalk Pastels
So here is 5 different ways on how to make you clay scented
*Keep in mind that some oils are stronger than others for example the chocolate scented oil I had bought had a much stronger smell the the mint scented oil
- Get a bit of your scented oil by using a cotton swab or using your fingers and mixing it in your polymer clay. (Now I tend not to do this because most times the clay becomes very sticky and sometimes I use up more clay then I need.)
- You could mix the oil with your varnish/glaze then brush it over your baked polymer clay item. After that clean your brush then reapply the varnish/glaze over the baked polymer clay item, once the first coating is dry.
- Have your polymer clay charm sculpted and ready (make sure it’s not baked) , then get your brush and your oil. Next lightly dip your brush it in to your oil, tab of any excess liquids (oil), then coat your polymer clay item over it and bake it for how ever long the instruction on the clay brand says for.
- First make you your polymer clay frosting by mixing TLS and you polymer clay in a cup. After it’s well mixed then add about 1 to 2 drops of your oil depending on the amount of TLS. (If your mix becomes to watery then add some more clay to get a thicker mixture.)
- Another way to this while using TLS is by getting your TLS and mixing it with your chalk pastels for color the adding a little drop of your oil in to the mix.
Subscribe to:
Posts (Atom)


